How to Secure Your Website on Shared Hosting (Beginner Guide)
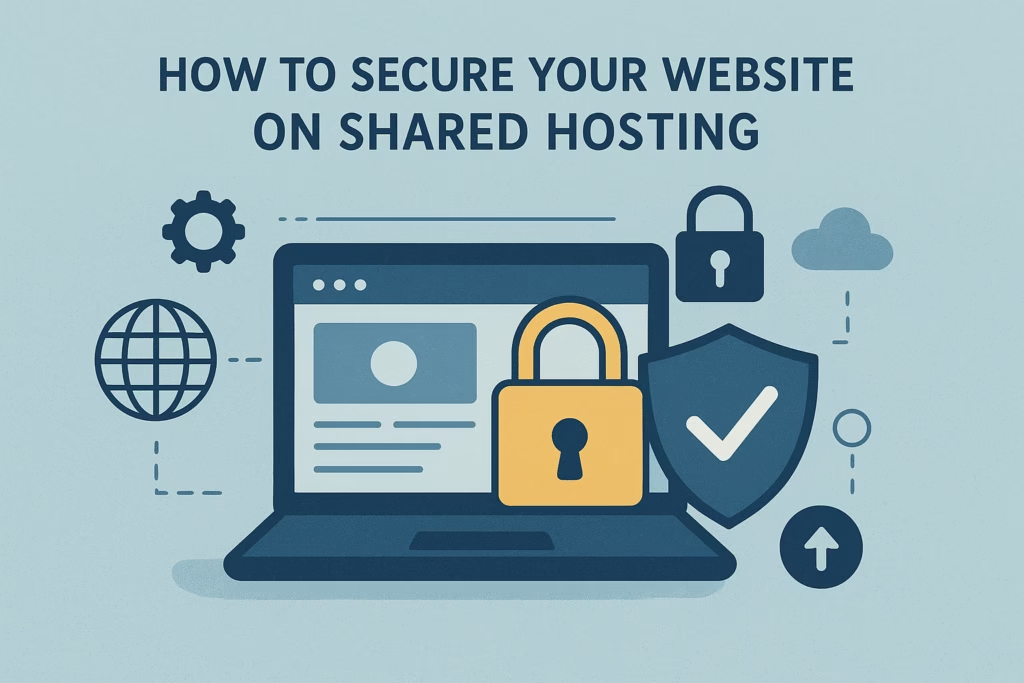
Starting a website shouldn’t feel like stepping into a minefield. You’ve chosen shared hosting because it’s affordable and gets you online quickly—that’s smart. But here’s the reality: sharing server space with dozens (sometimes hundreds) of other websites does open you up to security risks you need to understand.
Don’t panic, though. I’m not here to scare you into expensive upgrades. The truth is, with some straightforward precautions that won’t cost you extra money or require technical wizardry, you can run a secure website on shared hosting. I’ve seen plenty of beginners protect their sites effectively, and I’m going to show you exactly how they did it.
Why Security Matters in Shared Hosting
Let me paint you a picture. Imagine living in an apartment building where everyone shares the same front door lock. If someone in unit 3B uses “password123” and gets their place broken into, there’s a chance that burglar now has access to explore other units too. That’s essentially how shared hosting works.
When multiple websites operate on the same server, they share resources like IP addresses, storage, and sometimes even databases. If one site gets compromised—maybe someone installed a sketchy plugin or ignored security updates—hackers can potentially use that as a stepping stone to other sites on the same server. This isn’t fear-mongering; it’s just how the architecture works.
The stakes are real. Beyond the frustration of dealing with a hacked site, you risk losing customer trust, facing search engine penalties (Google actively flags compromised sites), and potentially exposing sensitive information. For small businesses and personal projects, recovering from a security breach can be devastating, both financially and emotionally.
But here’s what hosting companies won’t always emphasize: you have more control than you think. While you can’t change the shared environment itself, you can absolutely fortify your corner of it.
Beginner-Friendly Ways of How To Secure Your Website on Shared Hosting
Use Strong Passwords & Enable Two-Factor Authentication
I know, I know—you’ve heard this a million times. But there’s a reason security experts sound like broken records about passwords. According to recent breach analyses, weak credentials remain one of the top ways websites get compromised.
Here’s what actually works: Create genuinely random passwords for your hosting control panel (cPanel, Plesk, etc.), your CMS admin area, and your database. I’m talking about passwords that look like K9$mP2@vL8#qR5 —the kind you definitely need a password manager to remember. Speaking of which, use one. Bitwarden and LastPass both have free tiers that work perfectly for beginners.
Two-factor authentication (2FA) adds a second lock to your door. Even if someone somehow gets your password, they’d still need the temporary code from your phone to actually log in. Most hosting providers now offer this for your control panel, and WordPress has excellent plugins like Two Factor Authentication or WP 2FA that take about five minutes to set up.
Don’t skip the FTP/SFTP accounts either. If you’re using FileZilla or another FTP client to upload files, those credentials need the same attention. I’ve seen websites get compromised simply because someone used weak FTP credentials that were easy to brute-force.
Keep Your CMS & Plugins Updated
This might be the single most important thing you can do, and it’s completely free. Software updates aren’t just about new features—they’re often critical security patches that close vulnerabilities hackers actively exploit.
WordPress releases security updates regularly, and when they do, there’s usually a reason. Hackers literally scan the internet looking for sites running outdated versions with known vulnerabilities. It’s like leaving your front door unlocked with a sign that says “old lock, easy to pick.”
Set up automatic updates if your hosting allows it. WordPress has built-in auto-updates for minor releases, and you can enable them for plugins too (though I’d recommend testing major updates on a staging site first if you’re running a business-critical website). Most quality plugins update themselves automatically these days, but check your dashboard weekly to make sure nothing’s lagging behind.
The same goes for themes. That beautiful free theme you downloaded might look great, but if it hasn’t been updated in two years, it’s potentially a security liability. Stick with themes from reputable sources that actively maintain their code.
Install an SSL Certificate
If your website URL still starts with “http://” instead of “https://”, fixing this should be your top priority today. SSL (Secure Sockets Layer) certificates encrypt the data traveling between your visitors’ browsers and your server, making it nearly impossible for anyone to intercept sensitive information like passwords or credit card details.
The good news: most shared hosting providers now include free SSL certificates through Let’s Encrypt. Check your cPanel or hosting dashboard for an SSL/TLS section. Installing it usually takes one click, though you’ll also need to force HTTPS through your WordPress settings or an .htaccess file redirect.
Beyond security, SSL affects your search rankings. Google has openly stated that HTTPS is a ranking factor, and browsers like Chrome now display scary “Not Secure” warnings for sites without SSL. Your visitors notice these things, even if they don’t understand the technical details.
Use a Web Application Firewall (WAF)
Think of a WAF as a security guard who checks everyone trying to enter your website. It filters incoming traffic and blocks requests that look suspicious—like someone trying SQL injection attacks or attempting to access sensitive files they shouldn’t touch.
Cloudflare offers a free tier that includes a basic WAF, and it’s remarkably effective for beginners. The setup involves changing your domain’s nameservers (your hosting provider can help with this), and once it’s active, Cloudflare sits between your visitors and your server, filtering out malicious traffic before it even reaches your site.
For WordPress users, security plugins like Wordfence and Sucuri include built-in firewalls that don’t require nameserver changes. Wordfence’s free version includes real-time IP blocking, malware scanning, and brute-force attack protection. I’ve watched it block thousands of malicious login attempts on small websites that hackers assumed would be easy targets.
Regular Backups Are Your Safety Net
Here’s an uncomfortable truth: no security is perfect. You can do everything right and still face unexpected problems—maybe your hosting provider has a server issue, maybe you accidentally break something while updating, or maybe a zero-day vulnerability gets exploited before anyone even knows it exists.
Backups are your insurance policy. With a recent backup, a catastrophic hack becomes an annoying afternoon instead of a business-ending disaster.
Most shared hosting control panels include automated backup features. cPanel typically offers daily or weekly backups that you can restore with a few clicks. Enable these and actually test your backups occasionally to make sure they work—you don’t want to discover a broken backup system during an emergency.
For WordPress sites, plugins like UpdraftPlus (free version) or BackupBuddy can automate backups to cloud storage like Google Drive or Dropbox. Set them to run automatically at least weekly, more often if you update content daily. Keep backups in multiple locations—both on your hosting server and in external storage.
Limit File Permissions Correctly
File permissions determine who can read, write, or execute files on your server. Set them wrong, and you’ve essentially given hackers an open invitation to modify your website’s code.
The general rule for WordPress and most CMS installations: directories should be set to 755, and files should be 644. Your wp-config.php file (which contains your database credentials) should be 440 or 400 for extra security.
Access this through your cPanel’s File Manager or an FTP client. Right-click on files or folders, select “Permissions” or “File Attributes,” and adjust accordingly. If this sounds intimidating, most quality hosting providers have support articles with specific instructions, or their support team can help you get it right.
Never set permissions to 777 (full access for everyone) unless you’re troubleshooting a specific issue, and if you do, change them back immediately afterward. I’ve seen countless sites compromised because someone set loose permissions to fix a problem and forgot to tighten them again.
Disable Unused Plugins, Themes & Scripts
Every plugin and theme on your site is a potential entry point for attackers—even if you’re not actively using them. Deactivating a plugin isn’t enough; you need to actually delete it.
Go through your WordPress plugins and themes right now. If you haven’t used something in the last three months and can’t see yourself using it soon, delete it. The same goes for that collection of five themes you’re not using. Keep your active theme, maybe one backup theme, and that’s it.
This applies beyond WordPress too. If you’ve installed forums, galleries, or other scripts you’re not actively using, remove them completely. Old phpBB installations and abandoned scripts are hacker magnets.
Enable Security Plugins (For WordPress Users)
WordPress’s popularity makes it a frequent target, but it also means there’s an entire ecosystem of security tools designed to protect it. The free versions of reputable security plugins offer surprisingly robust protection.
Wordfence Security provides malware scanning, firewall protection, and real-time threat defense. Its free version blocks brute-force attacks, shows you live traffic (who’s accessing what on your site), and alerts you to potential issues.
Sucuri Security specializes in post-hack cleanup but also offers preventive features like security hardening, file integrity monitoring, and blacklist scanning (checking if your site has been flagged by Google or other security authorities).
iThemes Security (formerly Better WP Security) takes a different approach, focusing on hardening your WordPress installation by changing default settings that hackers commonly exploit.
Pick one—installing multiple security plugins can actually create conflicts and slow your site down. Wordfence is generally the most beginner-friendly option with its clear dashboard and detailed explanations of what each setting does.
Additional Hosting-Specific Security Tips
Choose Your Host Wisely (Even Within Shared Hosting)
Not all shared hosting is created equal. Some providers pack hundreds of sites onto a single server to maximize profits, while others maintain reasonable limits and invest in server-level security.
Look for hosts that offer malware scanning as part of their package. Many now include tools like Imunify360 or ClamAV that scan for malicious files automatically. Ask about their isolation technology—better hosts use CloudLinux or similar systems to isolate each account, so one compromised site can’t easily affect others.
Check whether they offer server-side security features like ModSecurity (a web application firewall that runs at the server level) and regular kernel updates. Your hosting provider’s security practices matter as much as your own.
Monitor Your Website Logs Regularly
Your hosting control panel includes access logs and error logs that tell you exactly who’s accessing your site and whether anything unusual is happening. Learning to read these takes practice, but even basic monitoring helps.
Look for patterns like repeated failed login attempts from the same IP address, requests for files that don’t exist (could be someone probing for vulnerabilities), or sudden traffic spikes from unexpected countries. Security plugins can help interpret this data, but even glancing at raw logs occasionally gives you insight into your site’s health.
Set up uptime monitoring through services like UptimeRobot (free for basic monitoring) so you’re immediately alerted if your site goes down unexpectedly—which could indicate a security issue.
Keep Yourself Educated
Security isn’t a one-time checklist; it’s an ongoing practice. Threats evolve, new vulnerabilities are discovered, and best practices change. Follow WordPress security blogs, join website owner communities, and stay informed about major security issues affecting your CMS or plugins.
The WordPress Security Team publishes regular updates about vulnerabilities and patches. Subscribing to security newsletters from your hosting provider keeps you informed about platform-specific issues. You don’t need to become a security expert, but staying generally aware helps you make better decisions.
Conclusion
Shared hosting gets a bad reputation in security discussions, and some of that criticism is fair. You are sharing resources, which inherently creates risk. But the idea that you can’t run a secure website on shared hosting is simply wrong.
Thousands of small businesses, bloggers, and portfolio sites operate securely on shared hosting every day by following the practices I’ve outlined here. None of these steps require advanced technical knowledge, expensive tools, or significant time investment. What they do require is consistency and attention to detail.
Start with the basics: strong passwords, 2FA, SSL, and automatic updates. Add a security plugin and set up regular backups. That alone puts you ahead of the vast majority of websites that get compromised through completely preventable vulnerabilities.
As your site grows and becomes more valuable, you might eventually need to consider VPS or dedicated hosting for additional control and isolation. But for most beginners and small websites, properly secured shared hosting provides more than adequate protection.
Your website’s security is ultimately your responsibility, regardless of your hosting type. The good news is that responsibility doesn’t have to be overwhelming. Take it one step at a time, build good habits, and you’ll sleep better knowing your corner of the internet is protected.
Frequently Asked Questions?(FAQ's)
Absolutely, as long as you implement basic security practices. The key is understanding that “safe” doesn’t mean “automatically protected.” Shared hosting is safe when you actively secure your site through SSL certificates, strong passwords, regular updates, and backups. Think of it like living in an apartment—it’s perfectly safe, but you still lock your door and don’t leave valuables in plain sight.
For most beginners, free versions of plugins like Wordfence or Sucuri provide excellent protection. The premium versions offer features like real-time IP blacklist monitoring, country blocking, and priority support, which become more valuable as your site grows or handles sensitive data. Start with free versions and upgrade only if you identify specific features you actually need.
It’s possible but less common than you might think. Modern hosting providers use isolation technologies to contain security breaches. However, since sites share the same IP address and sometimes server resources, a severely compromised site could potentially impact server performance or, in worst-case scenarios, provide attackers with information about other sites on the server. This is exactly why implementing your own security measures is crucial—you can’t control your server neighbors, but you can control your own security posture.
Not necessarily right away. VPS hosting does offer better isolation and more control, but it also requires more technical knowledge to configure and maintain properly. A poorly configured VPS can actually be less secure than well-managed shared hosting. Consider upgrading to VPS when your site handles sensitive customer data (like payment information), receives significant traffic that’s outgrowing shared resources, or when you’ve maxed out security options on shared hosting and still feel you need more control. For most small websites and blogs, properly secured shared hosting is completely adequate.
Share This Post:
Previous Articles:


How to Pick the Right Online Certification for Your Career Path


